

STREETLUGE
DOWNUNDER
Gear & Info Links:

THE SLED SHED:
This is where we will get down to the technical side of the sport with interviews and input from experienced riders and beginners alike, along with helpful hints and more in depth information on what you should and should not try.
It is a little light on at the moment so bare with me until I get some more info and interviews finalised.
HELPFUL HINT:
Number 1: Always when going to foot brake use a Heel First approach, never use your toes first. Failure to do so may result in not being able to foot brake again, as your feet won't be where they should be. Always a good one to remember.
TECH TALK:
Bearing Care: Bearings need your attention. Failure to do so can cause this to happen to you while riding (see pictures below) . Take it from me, it is not a good feeling and can cause issues when it lets go in a corner at speed. So in this section we are going to show you how to look after your bearings.


We have searched the web and have found some information we feel is pretty good advice. The "Rat Vision" video I have included at the end of this tech tip has some interesting and alternative ways of cleaning and caring for your bearings, along with some money saving tips on how to make your own bearing wash bottle. So let's get started.
Removing Bearings: Removing bearings from wheels is a fairly easy process that you can perform even if you don't have a bearing tool. Take the nut off the axle and slide the wheel along the axle so that the innermost bearing is just on the edge of the axle.
Using the same kind of motion as you would to open a bottle of beer, prise the bearing out of the wheel. Flip the wheel over and repeat, do the same for the rest of your wheels until you have all of your bearings out of your wheels.
Taking Bearings Apart: Once you’ve got your bearings out of your wheels, you need to get inside the cartridges. If you’re lucky, your bearings will only have a single shield. But most likely you’ll have to take one of the shields off so you can get to the balls and cage. With a rubber shielded bearing this is easy – just prize one shield off with a small screwdriver. Unless you are VERY careful you’re probably going to damage the shield taking it off – but that’s ok, you only really need one on each bearing. Metal-shielded bearings have a “C” clip around the outside of the race that you’ll need to take off. On some bearings it is possible to remove the balls and cage from the race entirely for individual cleaning, but unless you really have a lot of time on your hands I don't think it will improve their performance, so it's not really worth it.


Picture of bearing removal procedure
Picture of taking bearing apart procedure
Pictures of bearing failure damage
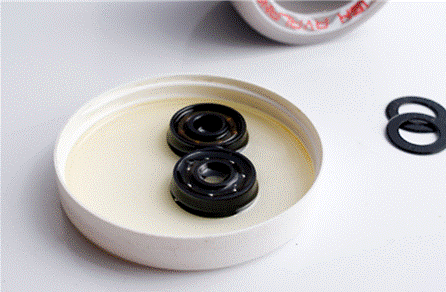
Cleaning: Next, you need to get all the dirt and grease out of your bearing races. Avoid using WD40 - the best bet is to use methylated spirit or just soak the bearings in some solvent or alcohol. Lemon juice works well too! Soak your bearings in your chosen liquid. Try putting the bearings in a jam jar and shake the bejeezus out of them for about 2 minutes, then rinse them with some more clean solvent.
Picture cleaning procedure
Re-lubricating: Dry them off (hair dryers are handy here) relube them with a touch of oil or similar lubricant. You don’t need much lube in there so don’t go too crazy! The thinner your lube, the faster your bearings will spin, but the more prone to destruction they will be. Oil helps your bearings spin faster, but if any dirt at all gets in there your bearings will be toast. Oil can have a nasty tendency to spin out of the bearing at speed leaving your bearings without any lubricant, leading to overheating bearings and melting wheels. On the other end of the spectrum is medium grease like the white stuff you can get at a bike shop. If you use this, your bearings will resist dirt better and should last a lot longer, especially if you ride in the rain. But on the flip side this can make them slightly slower. Really, your best bet is a skateboard bearing specific lube like Powell Speed cream or similar.
Finished: When you're done they should look like the picture beside. Put them back in your wheels, get the wheels back on the trucks, adjust the axle nut tension to allow approx. a millimetre of play. This will allow for expansion of the bearings under speed and will help their performance and assist in keeping them cool.
Picture of relubing procedure

This video from Rat Vision is worth watching and don't forget to check out their very informative site.
Picture of cleaned and relubed bearing
As I said there will be more to come for the Sled Shed so stay tuned.
HELPFUL HINT:
Number 2: In a crash situation always try to position the sled between you and any object you are heading towards. That way the sled/streetluge will help absorb some of the impact, and could make the difference between a trip to the hospital or not. Food for thought.


Subscribe
Become a Fan
YouTube
GO FAST LAYING DOWN!
STREETLUGE DOWNUNDER
© 2023 by Streetluge Downunder